
What to Check Before Calling for an AC Repair
Texas summers push air conditioners to their limits, and July in East Texas is no exception. When your AC stops cooling, your first instinct is to grab the phone and call for help. Before you do that, take a few minutes to check some common problem areas around your home. Many cooling issues come from simple causes like a tripped breaker, a dirty filter, or a thermostat set incorrectly. Checking these items first can save you the cost of a service call and get your home cool again faster. Homeowners in Longview, Kilgore, Marshall, and the surrounding areas run into these small issues every summer. This guide walks you through exactly what to check before calling for an AC repair. If your checks come up empty, a licensed technician can find the real problem quickly.
Simple AC Repair Checks You Can Do at the Thermostat and Electrical Panel
The two most common culprits behind a dead air conditioner are the thermostat and the electrical supply. Neither requires tools, and both take just minutes to inspect. Power surges from summer storms trip breakers all the time in East Texas homes. Thermostat batteries die without warning, and settings get changed by accident more often than you would think. Kids bump buttons, cleaning rags flip switches, and programmed schedules override manual changes. Start your AC repair troubleshooting at these two spots before you look anywhere else. A surprising number of service calls end with a technician flipping a breaker or replacing two AA batteries.
Check the Thermostat Settings Before Calling for an AC Repair
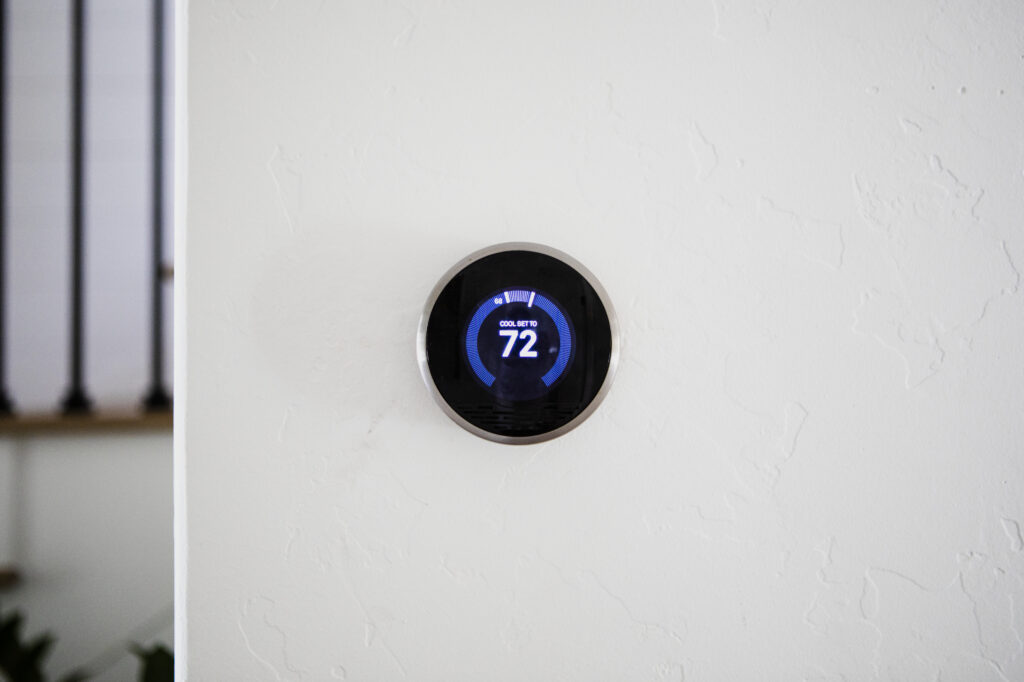
Walk to your thermostat and confirm it is set to Cool, not Heat or Off. This sounds obvious, but incorrect settings account for a large share of no-cool calls every summer. Check that the fan setting reads Auto rather than On; a fan set to On blows air constantly even when the system is not actively cooling, which makes homeowners think warm air means a broken AC. Lower the temperature setting at least five degrees below the current room temperature and listen for the outdoor unit to kick on. Give the system a few minutes, since many units have a built-in delay to protect the compressor. Look at the display screen itself while you wait. A blank or flickering screen usually points to dead batteries or a tripped breaker feeding the thermostat circuit. Replace the batteries with fresh ones even if the display looks fine, because weak batteries cause erratic behavior.
Programmable and smart thermostats add another layer to check during your AC repair troubleshooting. A vacation schedule or energy-saving program may be overriding your manual settings without you realizing it. Scroll through the schedule menu and confirm the current time period calls for cooling at the temperature you expect. Smart thermostats connected to Wi-Fi sometimes lose their connection and revert to default settings after a power outage. Check the app on your phone and confirm it matches what the wall unit displays. Some utility programs also adjust smart thermostats remotely during peak demand hours in summer. Look for an eco mode or demand response icon on the screen. Turning these features off temporarily tells you if the thermostat is the source of your cooling problem.
Thermostat placement and age matter too, and both can mimic a failing air conditioner. A thermostat mounted near a sunny window, a lamp, or a kitchen reads warmer than the rest of the house and shuts the AC off too late or runs it too long. Older mercury-style and early digital thermostats lose calibration over time, sometimes drifting several degrees from the true room temperature. Hold a separate thermometer near the thermostat and compare readings after ten minutes. A difference of more than two or three degrees means the thermostat needs recalibration or replacement. Loose wiring behind the wall plate also causes intermittent operation that looks like a compressor problem. Do not pull the thermostat apart yourself if you suspect wiring trouble. Want a reliable upgrade instead of another season of guesswork? Click here for our thermostat services.
Inspect the Breaker Panel and Disconnect Before Calling for an AC Repair
Open your electrical panel and find the breakers labeled for the air conditioner or condenser. Most central AC systems use two breakers, one for the indoor air handler and one for the outdoor unit, and both must be on for the system to run. A tripped breaker sits in the middle position between On and Off, which is easy to miss at a glance. Reset a tripped breaker by pushing it fully to Off first, then flipping it firmly back to On. Wait a few minutes and see if the system starts. Summer thunderstorms across Gregg and Harrison counties cause voltage spikes that trip AC breakers regularly. One trip after a storm is usually harmless. Repeated trips are a warning sign you should not ignore.
Next, walk outside to the condenser and look for the disconnect box mounted on the wall nearby. This gray metal box holds a pull-out block or a switch that cuts power to the outdoor unit for service. Landscapers, painters, and curious kids sometimes pull this disconnect without anyone knowing. Confirm the block is seated fully in the On position with the handle facing the correct direction. Some disconnect blocks can be inserted upside down, which leaves the unit powered off even though everything looks connected. Check for visible scorch marks, melted plastic, or a burning smell around the box while you are there. Those signs mean damaged wiring or a failing connection that needs professional attention immediately. Never open the disconnect box internals or touch exposed wiring yourself.
Understand the difference between a one-time trip and an electrical problem before you keep resetting breakers. A breaker that trips again within minutes of resetting is protecting your home from a serious fault. Possible causes include a shorted compressor, a seized condenser fan motor, or damaged wiring somewhere in the circuit. Resetting a breaker repeatedly can overheat wires and damage the compressor beyond repair. Compressors are the most expensive component in your system, so protecting one is worth a service call. Note how quickly the breaker trips and tell the technician when you call; that detail helps with diagnosis. Flickering lights or a humming panel when the AC starts also point to electrical issues. At that point, stop troubleshooting and schedule a professional AC repair. Need help now? Click here for our air conditioning repair service.
Look at the Air Filter as Part of Your AC Repair Checklist
Pull out your air filter and hold it up to a light source. Light should pass through easily; a filter that blocks light is choking your system. A clogged filter restricts airflow across the evaporator coil, which causes weak cooling, long run times, and higher energy bills. In severe cases, restricted airflow drops the coil temperature below freezing and ice forms on the refrigerant lines. A frozen system blows warm air and can flood your home with meltwater when it thaws. East Texas homes with pets, nearby construction, or high pollen counts clog filters faster than the packaging suggests. Check filters monthly during summer instead of trusting the 90-day label. A five-dollar filter change fixes more cooling complaints than most homeowners realize.
Replace the filter with the correct size and a sensible efficiency rating. The size is printed on the frame of the old filter, and the airflow arrow must point toward the blower, not away from it. A filter installed backward loads up with dust faster and can collapse into the blower housing. Avoid jumping to the highest MERV rating you can find at the store. Very restrictive filters starve residential blowers of air unless the system was designed for them. A MERV 8 to 11 filter balances filtration and airflow for most homes in our service area. Write the installation date on the filter frame with a marker. That simple habit keeps your replacement schedule honest all summer long.
If the filter was severely clogged, your system may need time and a little help to recover. Turn the thermostat to Off and set the fan to On for a few hours if you see ice on the copper lines at the indoor unit or outdoor unit. Running the fan alone thaws the coil faster and moves the meltwater into the drain pan where it belongs. Never chip ice off the coil, since the fins bend and the tubing punctures easily. Once the ice is gone, install the new filter and restart the system in Cool mode. Monitor the vents for strong, cold airflow over the next hour. Cooling that returns to normal means the filter was your whole problem. Ice that returns with a clean filter points to low refrigerant or a blower issue, and that requires a licensed technician.
Outdoor Unit and Airflow Checks to Make Before Calling for an AC Repair
Your outdoor condenser does the heavy lifting of rejecting heat from your home, and it needs open airflow to do that job. The indoor side needs clear vents and a working drain to keep cold air moving and moisture flowing out. Problems in either area produce symptoms that look like major failures but often have simple fixes. Grass clippings, cottonwood fluff, and storm debris pile up on condensers across White Oak, Gladewater, and Hallsville every summer. Closed vents and blocked drains cause the rest of the trouble indoors. Spend ten minutes on these checks before you assume the worst. You might restore full cooling without spending a dime.
Clear the Outdoor Condenser Before Calling for an AC Repair
Walk around your outdoor unit and inspect the metal fins on all sides. These thin aluminum fins release the heat your system pulled from inside the house, and they clog with grass clippings, dirt, dust, and cottonwood seeds. A condenser coated in debris cannot shed heat, so the system runs longer, cools less, and strains the compressor. Shut off power at the disconnect box before touching the unit. Rinse the fins gently with a garden hose, spraying from the top down at a low angle. Never use a pressure washer, because it flattens the fins and permanently reduces performance. Trim back shrubs, weeds, and fence panels to maintain at least two feet of clearance on all sides. Good clearance alone can restore noticeable cooling capacity on a hot July afternoon.
Listen to the outdoor unit while it runs and note what you hear. A healthy condenser produces a steady hum from the compressor and a consistent whoosh from the fan. A loud buzzing with no fan movement often means a failed capacitor, which is one of the most common summer AC repairs in East Texas. Grinding or screeching points to fan motor bearings wearing out. Clicking that repeats without the unit starting suggests a relay or contactor problem. Look through the top grille and confirm the fan blade spins freely and sits level. A fan that wobbles or scrapes the housing needs professional attention before it destroys the motor. Write down the sounds you hear, since that information speeds up diagnosis when a technician arrives.
Check the refrigerant lines running from the condenser into your house. The larger copper line should feel cold to the touch and sweat with condensation while the system runs. A larger line covered in ice signals restricted airflow or a refrigerant leak. Foam insulation on that line protects efficiency, so replace any sections that have rotted away in the sun. Look at the smaller line too; it should feel warm, not hot enough to burn. Oily residue around fittings or on the ground near the unit often indicates a refrigerant leak, since compressor oil travels with escaping refrigerant. Refrigerant work requires EPA certification and proper equipment, so never attempt to add refrigerant yourself. Suspect a leak or hear bad noises outside? Click here to schedule air conditioning repair with our licensed team.
Check Vents, Registers, and Ductwork Before Calling for an AC Repair
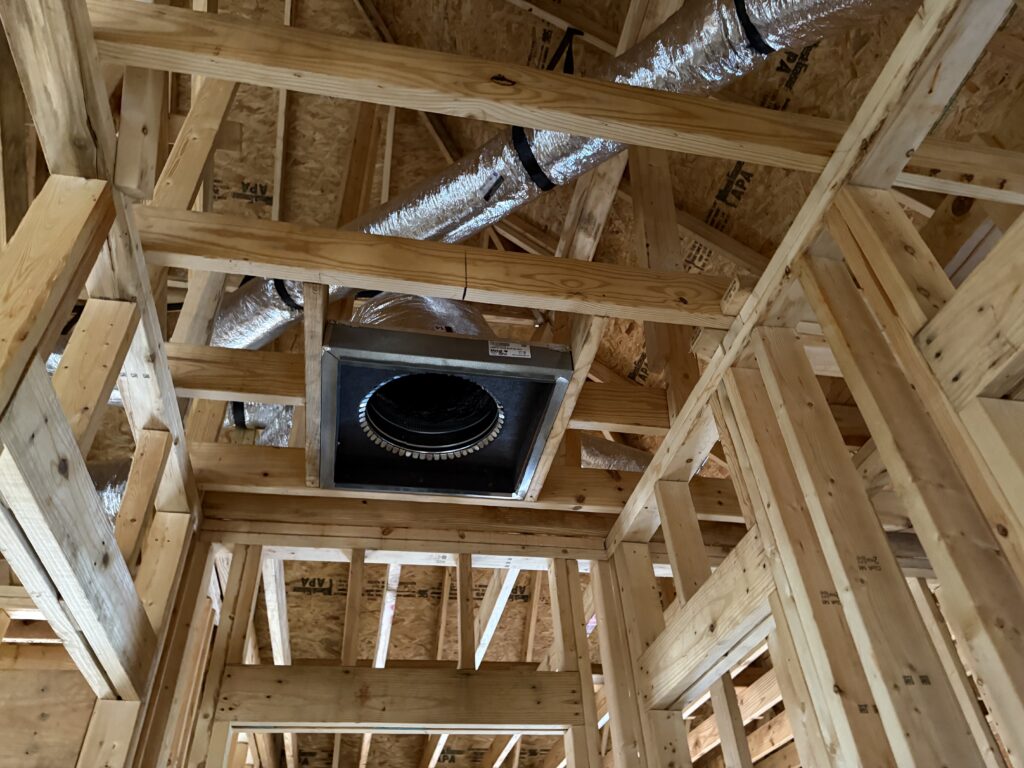
Walk through every room and confirm the supply vents are fully open. Closing vents in unused rooms seems like a smart way to save energy, but it actually raises pressure in the duct system and reduces total airflow. High duct pressure forces air through leaks, strains the blower motor, and can freeze the evaporator coil. Open every vent, including the ones in guest rooms and closets with registers. Move furniture, rugs, and curtains away from both supply vents and return grilles. A blocked return starves the entire system of air, and many homes have only one or two returns. Hold your hand over each vent and compare airflow from room to room. Weak flow in one area with strong flow elsewhere points to a duct problem rather than an equipment failure.
Inspect any ductwork you can safely see in the attic or crawlspace. Attic temperatures in East Texas exceed 130 degrees in July, and flexible ducts take a beating up there. Look for sections that have been crushed by stored boxes, kinked at sharp turns, or disconnected at the joints. A disconnected supply duct dumps your expensive cold air straight into the attic while your bedrooms stay warm. Torn outer insulation lets attic heat soak into the airstream and cuts cooling capacity significantly. Listen for whistling or hissing near duct connections while the system runs. Those sounds indicate air escaping through gaps and leaks. Duct leakage wastes 20 to 30 percent of conditioned air in a typical home, according to ENERGY STAR estimates.
Pay attention to rooms that never cool properly no matter what the equipment does. Uneven cooling usually traces back to duct design, leakage, or insulation rather than the air conditioner itself. Hot upstairs rooms and cold hallways are classic signs of an unbalanced duct system. Dusty air, musty smells from vents, and rising energy bills also point toward duct problems. Sealing and repairing ducts often improves comfort more than any equipment repair could. Professional duct testing measures exactly how much air your system loses and where. That data turns guesswork into a targeted fix. Think your ducts are the problem? Click here for our air duct services: https://iwantclimate.com/services/air-ducts/
Inspect the Drain Line Before Calling for an AC Repair
Your air conditioner removes gallons of water from the humid East Texas air every day, and all of it exits through the condensate drain line. Find the indoor unit and locate the PVC drain pipe running from the drain pan to the outdoors or a plumbing connection. Algae, mold, and sludge grow inside this warm, wet pipe all summer long. A clogged drain line backs water up into the drain pan, and a full pan triggers a float switch that shuts the whole system down. Many homeowners call for an AC repair when the real problem is a five-minute drain clog. Look for water pooling around the indoor unit or stains on the ceiling below an attic installation. Standing water means the drain needs attention right now. Water damage from an overflowing pan costs far more than any AC repair.
Clear a clogged drain line with a wet/dry vacuum at the outdoor termination point. Find where the PVC pipe exits near the outdoor unit or through an exterior wall. Seal the vacuum hose against the pipe opening with your hand or a rag and run it for two or three minutes. The suction pulls the algae plug out along with the backed-up water. Pour a cup of distilled white vinegar into the drain access tee near the indoor unit afterward to slow future algae growth. Repeat the vinegar treatment monthly during cooling season. Avoid bleach in drain lines, since it can corrode metal drain pans and damage nearby components over time. Systems with a secondary drain pan under the unit deserve a look too; water in that pan means the primary drain already failed once.
Check the float safety switch if your system shut off and the drain looks suspect. This small switch sits on the drain pan or inline on the drain pipe and cuts power when water rises too high. A tripped float switch resets itself once the water level drops after you clear the clog. The system should restart within a few minutes of a successful drain cleaning. A switch that keeps tripping with a clear drain may be faulty or positioned wrong. Repeated drain clogs signal a sagging drain line or improper slope that needs correction. A technician can reroute the line and add a cleanout for easy future maintenance. Solving drainage right protects your ceilings, floors, and indoor air quality all summer.
Why You Need Professional AC Repair When Basic Checks Fail
Sometimes the thermostat is set right, the breakers are on, the filter is clean, and the AC still will not cool. That is the point where do-it-yourself troubleshooting ends and professional AC repair begins. Refrigerant circuits, capacitors, compressors, and control boards require training, licensing, and specialized tools to diagnose safely. Guessing at these repairs risks electrical shock, refrigerant exposure, and expensive equipment damage. A licensed technician pinpoints the actual fault in one visit and fixes it correctly the first time. Fast professional service also matters in July, when a broken AC in East Texas becomes a health concern within hours.
Professional AC Repair Protects Your System and Your Safety
Air conditioning systems combine high-voltage electricity, pressurized refrigerant, and moving mechanical parts. Capacitors hold a dangerous electrical charge even after power is disconnected. Refrigerant causes frostbite on contact and requires EPA Section 608 certification to handle legally. A trained technician works with the right meters, gauges, and safety procedures every day. Attempting these repairs yourself puts your safety and your home at risk. Professional AC repair removes that danger entirely.
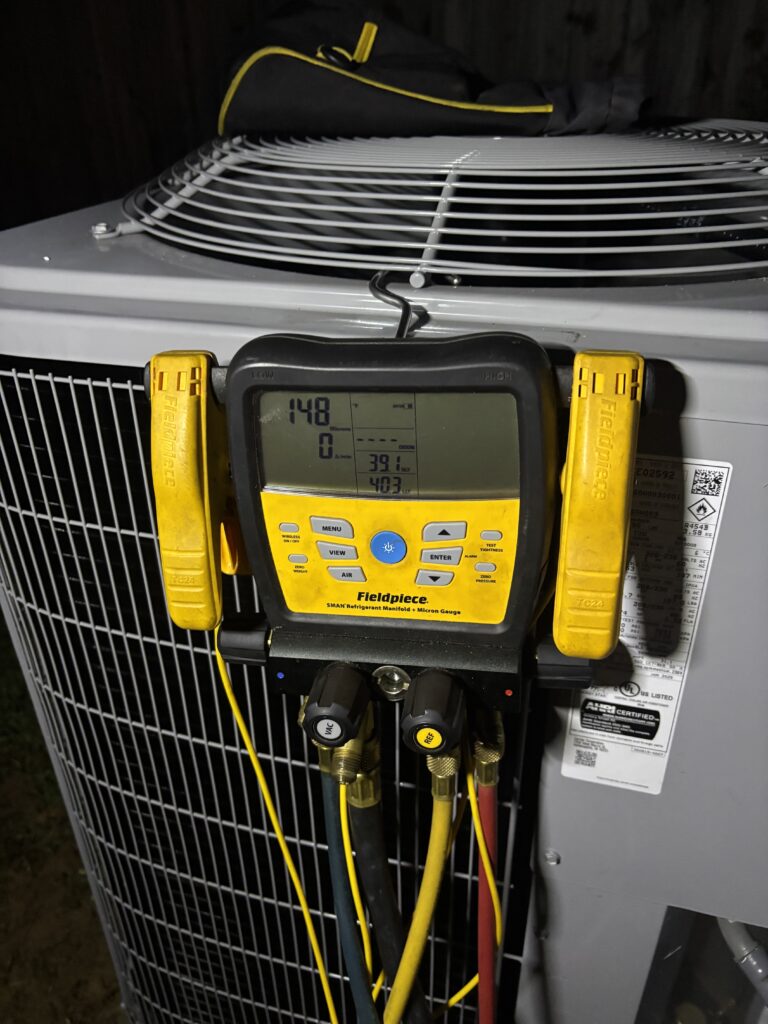
Correct diagnosis is the other half of what a professional brings to an AC repair. A system blowing warm air could have a failed capacitor, a bad contactor, a refrigerant leak, or a dying compressor. Each fault produces similar symptoms but demands a completely different fix. Replacing parts by guesswork wastes money and leaves the real problem in place. Technicians use gauge readings, temperature splits, and electrical measurements to identify the true failure. You pay for one accurate repair instead of a string of wrong ones.
Timely professional repair also prevents small problems from becoming system killers. A weak capacitor forces the compressor to work harder every start until the compressor windings burn out. A slow refrigerant leak lets the compressor run hot and starved for months before catastrophic failure. Compressor replacement costs many times more than the small repair that would have prevented it. Catching faults early extends equipment life by years. Calling for AC repair at the first sign of trouble is the cheapest decision you can make.
Professional AC Repair Saves Money on Energy and Future Breakdowns
A struggling air conditioner consumes far more electricity than a healthy one. Low refrigerant, dirty coils, and weak capacitors all force longer run times to reach the same temperature. Your electric bill climbs every month the problem goes unfixed. July and August bills in East Texas are painful enough with a healthy system. Professional AC repair restores efficiency and puts that wasted money back in your pocket. Many repairs pay for themselves within a single cooling season.
Professional service also comes with accountability that DIY work never provides. R.C.s A/C Reliable Climate backs repairs with a 1-year labor warranty and offers a 10-year parts warranty on qualifying work. A warranty means the fix is guaranteed, not hoped for. Documented professional repairs also protect manufacturer warranties on newer equipment. Manufacturers can deny coverage on systems serviced improperly or opened by unlicensed hands. Keeping a professional service record preserves every dollar of warranty value you paid for.
Budget concerns should never keep your family sweating through a Texas summer. Free estimates are available for new HVAC installations if your system is beyond sensible repair. Financing options are available for both HVAC and refrigeration services. A technician will give you honest numbers comparing repair cost against replacement value. No pressure and no unnecessary upsells, just the information you need to decide. That approach keeps your total cost of comfort as low as possible.
Why Choose R.C.s A/C Reliable Climate for AC Repair
R.C.s A/C Reliable Climate is locally owned and operated right here in Longview at 3 Lewis Drive. We hold Texas HVAC License #TACLA129043C and carry full insurance on every job. Our technicians live and work in the same East Texas heat you do. We serve Longview, Kilgore, Marshall, White Oak, Gladewater, Gilmer, Hallsville, Lakeport, and Liberty City. Local ownership means we answer to our neighbors, not a corporate office. Your call gets a real response from people who care about this community.
Honesty drives every recommendation we make. We diagnose the actual problem and explain your options in plain language. You will never hear an unnecessary upsell from our team. We back our work with a 10-year parts warranty and a 1-year labor warranty. Free estimates on new HVAC installations take the risk out of planning a replacement. Financing keeps quality repairs and new equipment within reach for every budget.
AC failures never wait for business hours, so neither do we. Our 24/7 emergency HVAC service means help is available at 2 AM on the hottest night of the year. We are dedicated to providing 5 star service on every single visit. Call us at (903) 316-6855 or email info@iwantclimate.com to schedule your AC repair today. Do the simple checks first, then let us handle the rest. Your comfort is our business, and we take it seriously.